
My illustration work relies heavily on drawing and I have found over the years that I can lose line quality and vivacity if I try to recreate a drawing ‘in best’.
So nowadays I mostly now use the original drawings. But these usually need to be tinkered with.
Photoshop is like driving a car. There’s loads of stuff under the bonnet and I don’t even know what most of it called - but that doesn’t matter because all I want to do is go for a drive. There are also many different ways of driving – and possibly all of them are correct.
Here is one way of removing background from a drawing so that you can use it as the line layer for your artwork.
1. Scan in Greyscale.

2. I always duplicate that layer – so if I mess it up I still have the original.
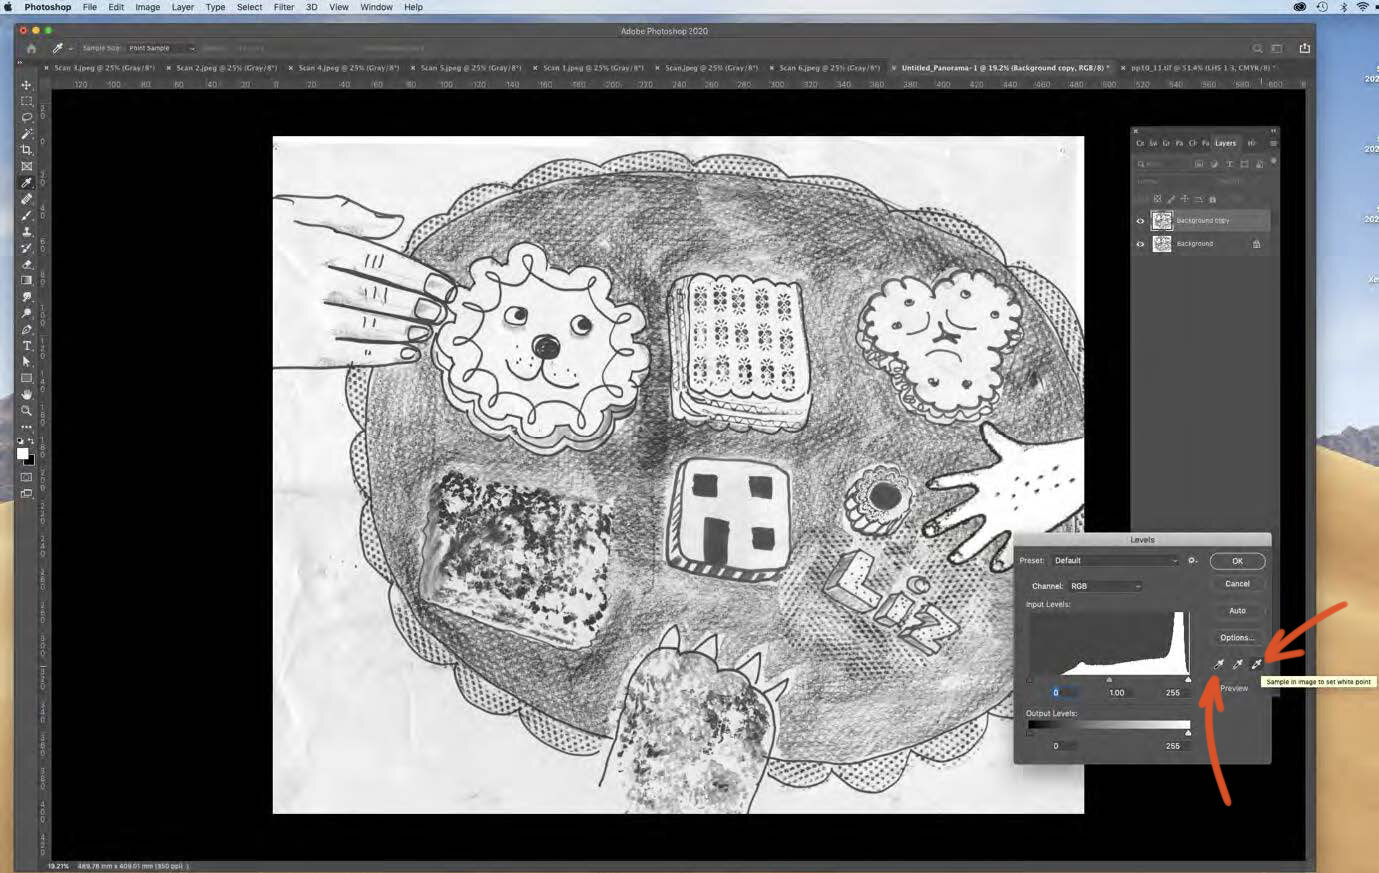
3. Then from top menu bar select: Image > Adjustment > Levels
4. Use the eye droppers to decide on values for the whitest (the ‘white point’ = far right dropper) and the blackest (the ‘black point’ = left dropper) areas – so that you have plenty of contrast. It’s worth experimenting with this stage to get more or less graininess and texture.
5. Select the whole image and make it a channel.
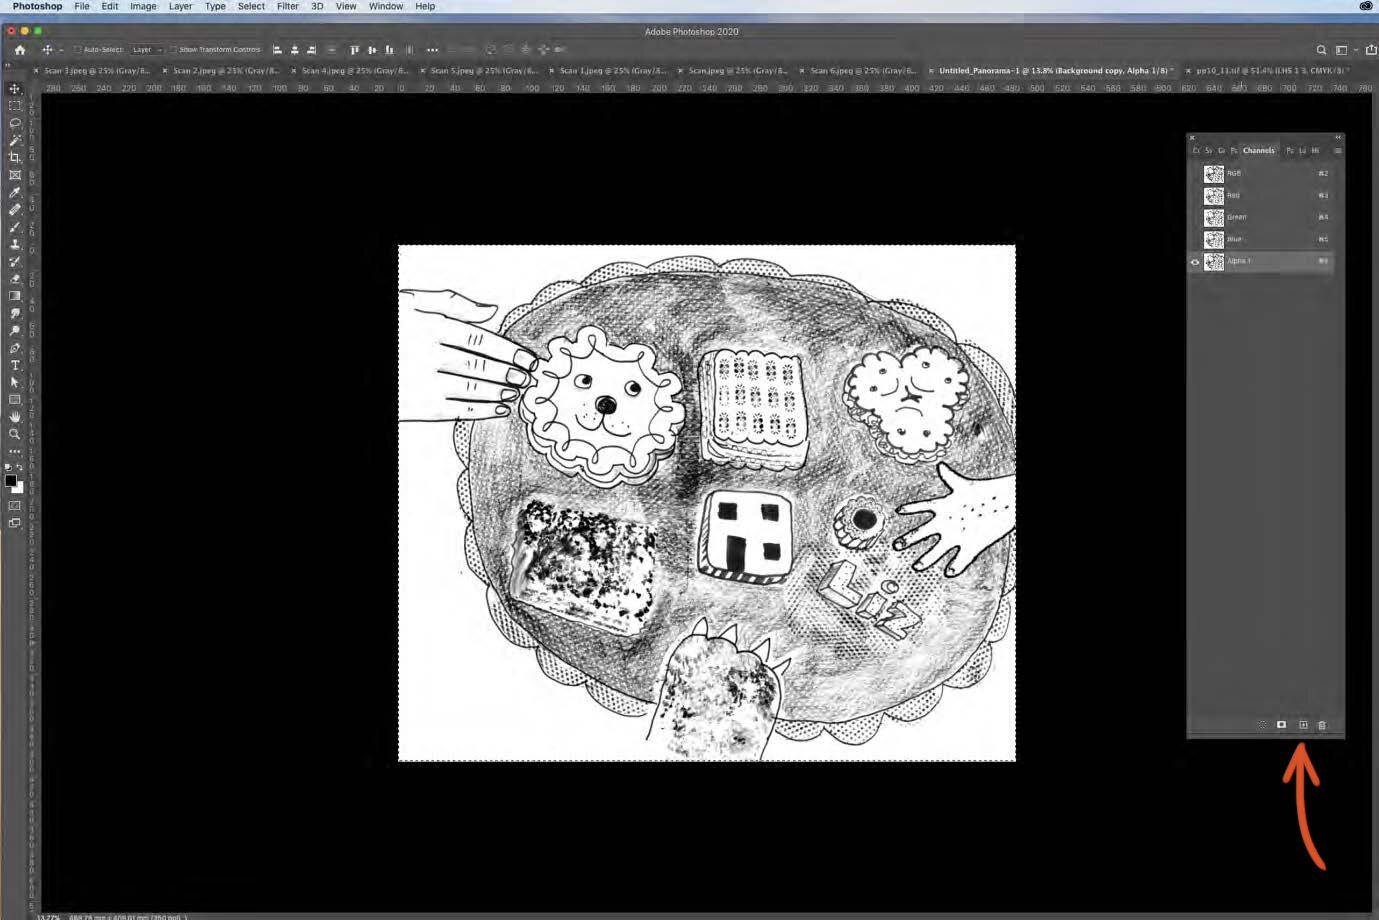
6. Then Invert the image in this new channel (command + i).

7. Load the selection (the little circle at the bottom of the channel box).

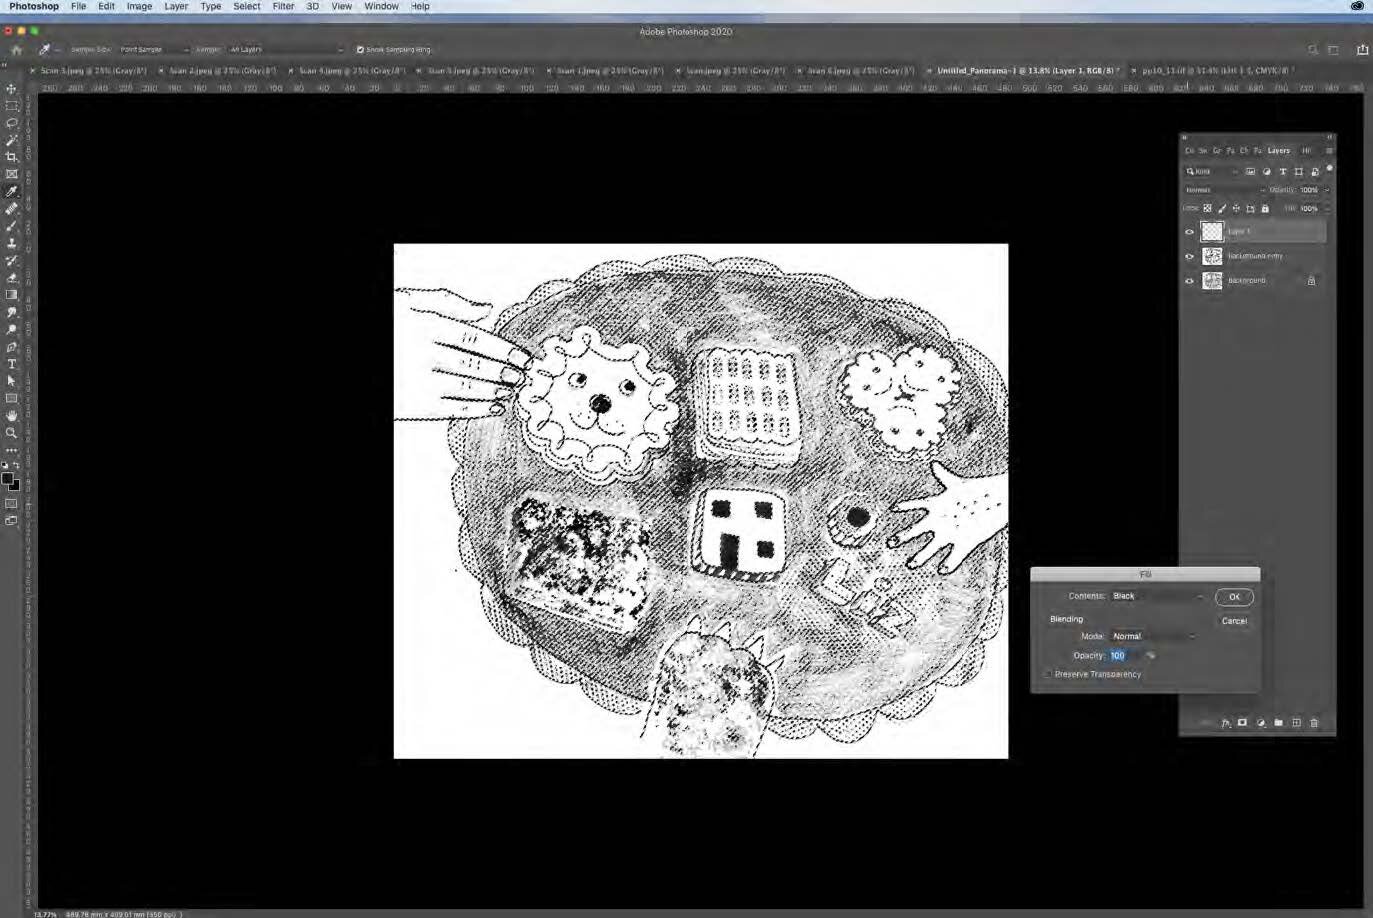
8. Go to your Layers > open a NEW layer > Edit > Fill that layer in black… and Ta Dah … you have your drawing in black line all by itself, complete with all the lovely texture of your pencil drawing/print/collage.

9. It’s a good idea to rename that layer ‘Line’…

10. …and to add another layer underneath called ‘white’ that is filled with white. This makes it much easier to see what you’re doing as you work on the line layer.
11. Locking the line layer means you can colour just the line using the brush tool. The rest is really transparent … it only looks white here because of that White layer underneath.

12. I bring in scanned in collage/ paint or use the photoshop colours underneath the line layer.
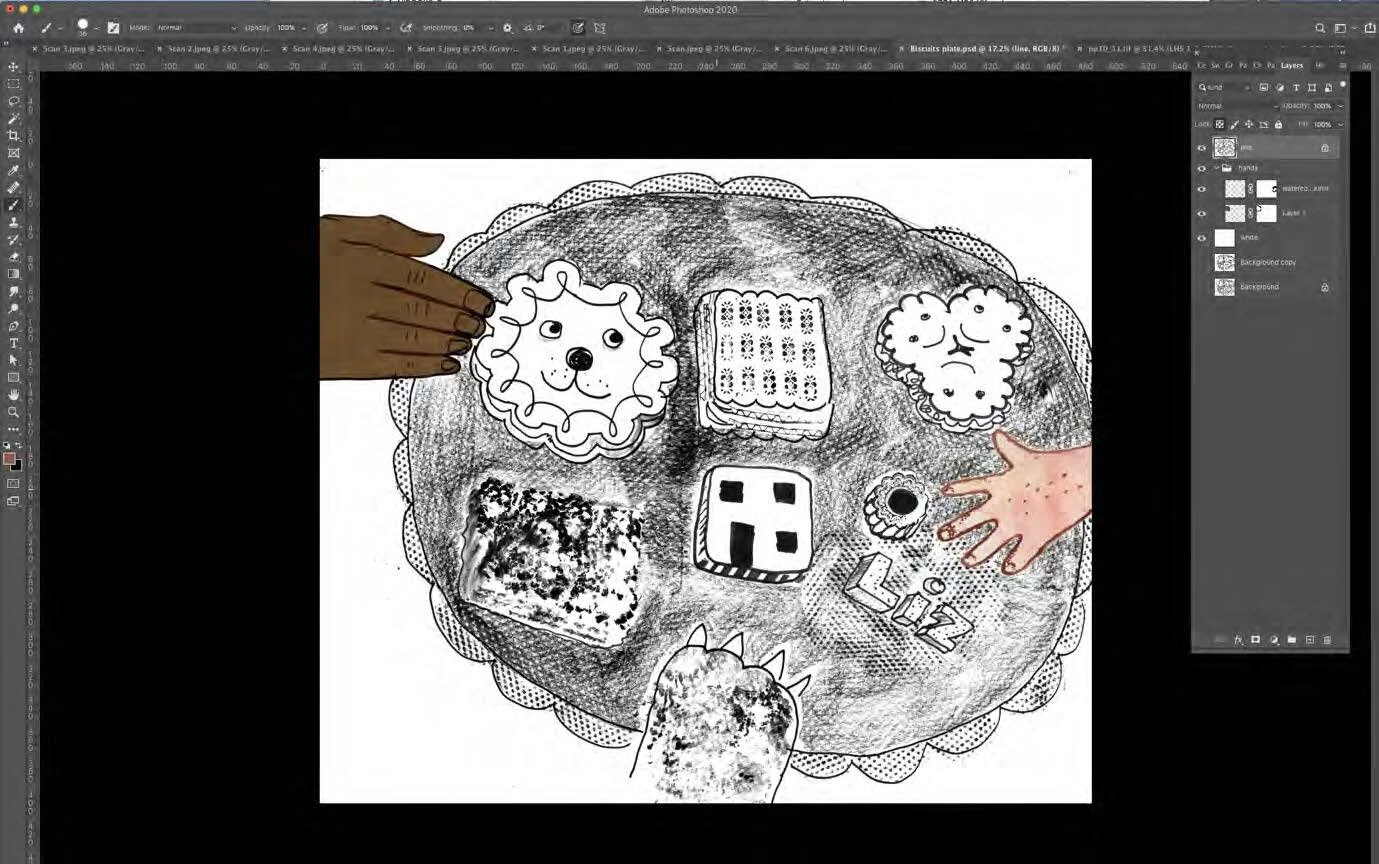

13. You can have as many line layers as you like… bringing it separate bits of drawing.
14. Just remember to lock the layer if you want to colour ONLY the line

